It is important to understand how artifacts are created that you use during an investigation. Thus I wanted to provide my block building checklist to help others recreate the process. I will walk through the commands used to prepare the blocks for distribution and how to build the block libraries with the removal of a whitelist.
I have used Windows, Linux and Mac OS X over the course of this project. I recommend using the operating system that your most comfortable with for downloading and unpacking the VirusShare.com torrents. The best performance will come from using solid state drives during the block building steps. The more available memory during whitelisting the better. A lot less system resources are necessary when just doing hash searches and comparisons during block hunting.
We saw this command previously in the
Block Huntingpost with a new option. The -x option disables parsers so that bulk_extractor only generates the block sector hashes reducing the necessary generation time.
bulk_extractor -x accts -x aes -x base64 -x elf -x email -x exif -x find -x gps -x gzip -x hiberfile -x httplogs -x json -x kml -x msxml -x net -x pdf -x rar -x sqlite -x vcard -x windirs -x winlnk -x winpe -x winprefetch -x zip -e hashdb -o VxShare199_Out -S hashdb_mode=import -S hashdb_import_repository_name=VxShare199 -S hashdb_block_size=512 -S hashdb_import_sector_size=512 -R VirusShare_00199
The following steps help with the reduction of disk storage requirements and reporting cleanliness for the sector block hash database.
It is also a similar process for migrating from hashdb version one to two.
One improvement that I need to make is to use JSON instead of DFXML that was released at
OSDFCon2015 by Bruce Allen.
We need to export the sector block hashes out of the database so that the suggested modifications can be made to the flat file output.
hashdb export VxShare199_Out/hashdb.hdb VxShare199.out
· hashdb – executed application
· export – export sector block hashes as a dfxml file
· VxShare185_Out/ – relative folder path to the hashdb
· hashdb.hdb – default hashdb name created by bulk_extractor
· VxShare199.out – flat file output in dfxml format
Copy the first two lines of the VxShare199.out file into a new VxShare199.tmp flat file.
head -n 2 VxShare199.out > VxShare199.tmp
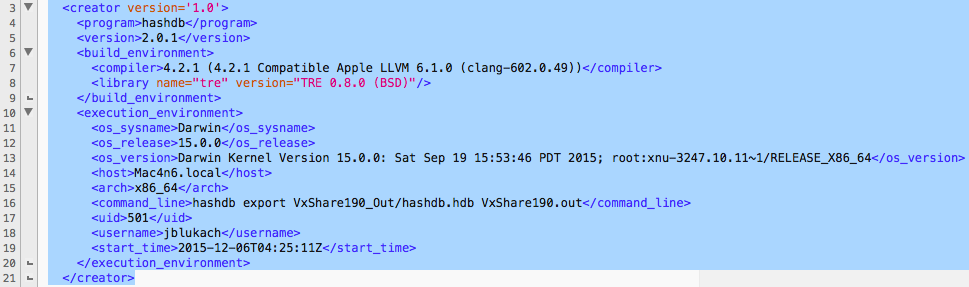
Start copying the contents of VxShare199.out file at line twenty-two that are appended to the existing VxShare199.tmp file. The below image indicates what lines will be removed by this command. The line count may vary depending on the operating system or the version of bulk_extractor and hashdb installed.
tail -n +22 VxShare199.out >> VxShare199.tmp
The sed command will read the VxShare199.tmp file than remove the path and beginning of the file name prior to writing into the new VxShare199.dfxml file. The highlighted text in the image below indicates what will be removed.
sed ‘s/VirusShare_00199\/VirusShare\_//g’ VxShare199.tmp > VxShare199.dfxml
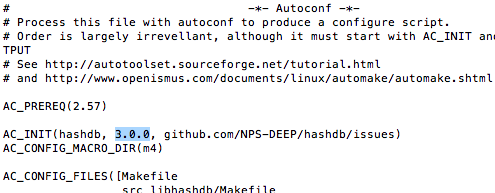
Create an empty hashdb with the sector size of 512 using the -p option. The default size is 4096 if no option is provided.
hashdb create -p 512 VxShare199
Import the processed VxShare199.dfxml file into the newly created VxShare199 hashdb database.
hashdb import VxShare199 VxShare199.dfxml
I compress and upload the hashdb database for distribution saving these steps for everyone.
The links to these previously generated hashdb databases can be found at the following link.
Create an empty hashdb called FileBlock.VxShare for the VirusShare.com collection.
hashdb create -p 512 FileBlock.VxShare
Add the VxShare199 database to the FileBlock.VxShare database. This step will need to be repeated for each database. Upkeep is easier when you keep the completely built FileBlock.VxShare database for ongoing additions of new sector hashes.
hashdb add VxShare199 FileBlock.VxShare
Download the sector hashes of the NSRL from the following link.
Create an empty hashdb called FileBlock.NSRL for the NSRL collection.
hashdb create -p 512 FileBlock.NSRL
The NSRL block hashes are stored in a tab delimited flat file format. The import_tab option is used to import each file that are split by the first character of the hash value, 0-9 and A-F. I also keep a copy of the built FileBlock.NSRL for future updates too.
hashdb import_tab FileBlock.NSRL MD5B512_0.tab
Create an empty hashdb called FileBlock.Info for the removal of the whitelist.
hashdb create -p 512 FileBlock.Info
This command will remove the NSRL sector hashes from the VirusShare.com collection creating the final FileBlock.Info database for block hunting.
hashdb subtract FileBlock.VxShare FileBlock.NSRL FileBlock.Info
The initial build is machine time intensive but once done the maintenance is a walk in the park.
Happy Block Hunting!!
John Lukach
@FileBlocks
Continue reading Block Building Checklist→